Learn Modeling Fimo
There’s always something else to learn, right? So let’s learn Modeling Fimo!
We’ve created a new area in the site. A learning area. From little tips to complex projects, material and behavior to review of new products.
Before you start here some tips to learn modeling Fimo!
Before starting to work or play with Fimo there’s some details you should consider to make sure all turns out like you imagine!
Preparing is the key for success in the Fimo art. The place where you work, the cleansing of your hands, tools and workspace. The exact temperature of your oven and the technics surrounding polymer clay. So let’s start learn modeling clay!

when learning a new thing or working with it everyday you’ll find that you will learn something new more often than you thought! We are here to do just that, share with you what we know and maybe it will be new to you. So let’s learn modeling Fimo!
Now that you have your Fimo and your project, take notice:
- Use a fitting surface to work on
- Clean your work surface as well as your hands
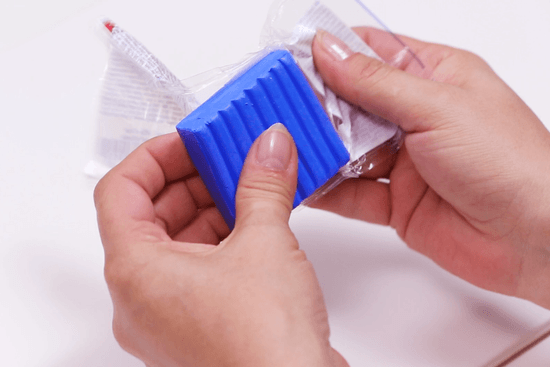
- Properly unpack the FIMO block
- Hardening FIMO modelling clay according to the guide
- Proper storage of FIMO
- Finishing Fimo surface
Use a fitting surface to work on
Here’s some suitable surfaces to work with Fimo:
- Glass plate
- Tile
- Baking paper
This kind of surfaces don’t react with Fimo and are even, without textures and flat. You will remove your clay easily.
Cleaning hands and work surface before working with FIMO
Cleaning your hands and your work space removes dust and can be transferred to your modelling clay. You can use a damp cloth, baby wipes or alcohol in cotton.

Using the Fimo package to your advantage
The Fimo package is designed to be resealable so you can open and close to store the simpler way possible. And the shape of the block is divided so you can easily measure the quantity of clay for each project, each block has 8 equal stripes.

Hardening FIMO correctly
Contrary to what is said FIMO is not baked, is cured, becomes hard when it is cured and it doesn’t change shape and color afterwards.
To harden FIMO, the oven should be preheated to 110°C only then you can put a tray with your Fimo pieces for 30 minutes. Every oven is different and has a thermostat that can be regulated slightly different, it is recommended to use an oven thermometer to ensure the Fimo cures correctly, and your model will not burn or turn an unpleasant burnt color or be crumbly by not being cured enough. Exceeding this temperature is not recommended and should be always avoided.

Storing FIMO correctly
After each project there is a need to store the leftovers to be used next time, and for that to happen you have to store it properly.
FIMO does not need to be stored in an airtight container, but should be protected from dust. It should also be stored away from heat and sunshine. Aluminium foil or PE bags in a cool and dry place are what we recommend for best storing. Always avoid any contact with polystyrene or PVC.

Finishing Fimo surface
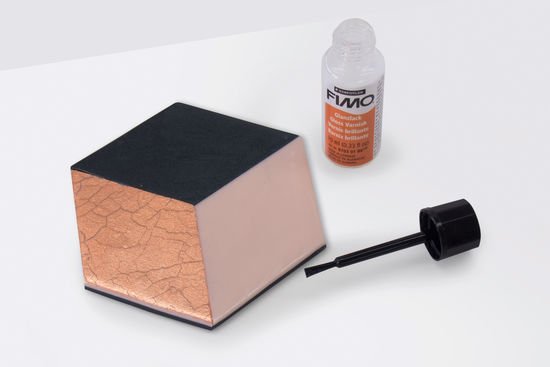
When finishing your piece in Fimo remember, you can sand it, paint it, pierce it, cut it and varnish it. Fimo range of products has all the product you need for this finishings. Remember never to use nail polish or any kind of varnish not water based. A trick with Fimo varnish? After applying and dry it put it again in the oven for 15 minutes more and compare! A lavish gloss emerges!

One or two more things before you start, that we believe you should know to learn modeling clay:
- Fimo is not toxic.
- Bad storage can ruin your Fimo clay.
- You don’t need all the tools in the world to start making Fimo, you just need Fimo, your hands, a working base, a toothpick, a blade, a oven and some baby wipes.
- Don’t throw away crumbly clay.
- Metal, wood or paper can be used with Fimo and go to the oven.
- You can use alcohol inks and silicone molds.
- Proper baking is extremely important.
- You can paint polymer clay, using only water based paints.
- Polymer clay doesn’t have to be necessarily sealed or glazed.

Want to try and start working with this fabulous material? Here some beautiful projects to you!
Learn modeling Fimo!!!
Projects, ideas and trends!
Fruity neon FIMO glass cover and coaster
A great and easy project for summer! Bright and fruity coasters and glass covers.


Kiwi Coaster
1 – To make the kiwi coaster, you will need half of a Neon Green Fimo Effect Soft block an half of Black Fimo Soft strip.
Roll out the Neon Green FIMO until is flat and evenly spread then cut or punch out a circle 7.5 cm approximately.

2 – Mix the rest of the Neon Green Fimo with Half of the White Fimo block until is a evenly color of a lighter green and shape it oval. Make the same routine for a white circle, a small piece is enough, in the center of the pale green oval. Now for the skin of the kiwi, you will need to knead the remaining green with a piece of black, not too much, and adjust on the outer of the circle the rolled band.
Now place the oval lithe green and white oval on top of your Neon Green Fimo circle and roll very carefully all the layers together until it measures approximately 9.5 cm.

3 – To make the tiny seeds you’ll need to roll out a string of Black Fimo Soft and cut it on small pieces with a blade. make little balls and place them on the kiwi on the lighter green around the with shape mimicking a ring. Almost done, you now need to pierce the hole for the straw.

Dragon Fruit Coaster
1 – Cut half a block of White Fimo Soft, one strip of Neon Pink Fimo and also half a strip of Black Fimo Soft to start working.
Start with the White Fimo and roll it until is flat, even and spreader, then cut or punch a circle of around 7.5 cm approximately.

2 – For the beautiful skin of our Dragon Fruit roll a thin band of Neon Pink Fimo and carefully place it around the white circle. Use an acrylic roller, a bottle or a glass to roll carefully until the circle measures about 9.5 cm.

3 – The tiny seeds are made from a thin roll of Black Fimo Soft cutter in small pieces and rolled in your fingers until they form a small ball, then press it in the whit part of your Dragon Fruit. It’s almost done, just punch a hole for the straw.

Watermelon Coaster
1 – You will need half a block of Neon Pink Fimo Effect, a strip of Neon Green Fimo Effect, a strip of White Fimo Soft and half a strip of Black Fimo Soft. Roll the Neon Pink Fimo Effect until flat and even then cut or punch a circle, 7,5 cm approximately.

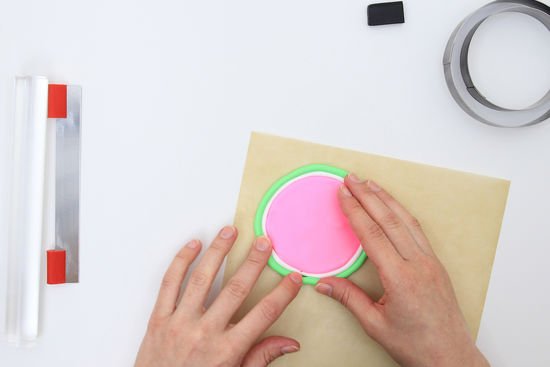
2 – Roll two bands of Neon Green Fimo and White Fimo Soft and place them around the pink circle, first the white one and then the green one. Press them gently and then roll them carefully until your circle reaches approximately 9.5 cm of diameter.

3 – Watermelon seeds are shaped in a drop and the pointy end point to the center of the circle. Roll a string of Black Fimo Soft and cut small pieces. Create small drops, roll the balls on one side with your fingers and add them to the circle.
Almost done, make the straw hole!
4 – On a lined tray place all the coasters you just made and bake them on the oven for 30 minutes at 110°C With the top and bottom heat.
Wait for them to cool down put the straws through the holes on the covers and place the over your glass.

And now enjoy your cool drink in summer style!


